Home / Handy Tips /

Microsoft Excel is a powerful and popular business tool because of its ability to organise, format and calculate data in a spreadsheet by finance, operations, human resources, administrative and management teams alike. Some of its main uses in business include:
- Data entry and management
- Accounting and financial analysis
- Time and task management
- Modelling and forecasting
- Performance and project management
- Data visualisation with graphs
Because of how widespread the use of Excel is, spreadsheets are often distributed both company-wide and externally, and there may be times when you need to protect or lock cells or sections in a spreadsheet to prevent data from being altered. In this event, you need to know how to lock cells in Excel.
When would I need to lock cells in Excel?
As mentioned, Excel spreadsheets tend to be shared across teams and with people external to the company you work within. Perhaps you’re sharing a financial model you’ve built to justify a new investment, or are sharing historical data for reporting by another business unit. Or, you could be confidentially sending employee data and salary details to management for a remuneration review.
Either way, there could be cells in your spreadsheet that should not be updated, either accidentally or deliberately, which is when you would lock cells in Excel.
How do I lock cells in Excel?
In Excel you can lock individual cells, or multiple cells (so that you can protect a section of your spreadsheet that you don’t want changed).
In the example below, we have customer records, and want to lock the Customer Number field, which should never be updated (the other fields may change, but the Customer Number will not). To lock that column, we’ll highlight the records we want to lock first:
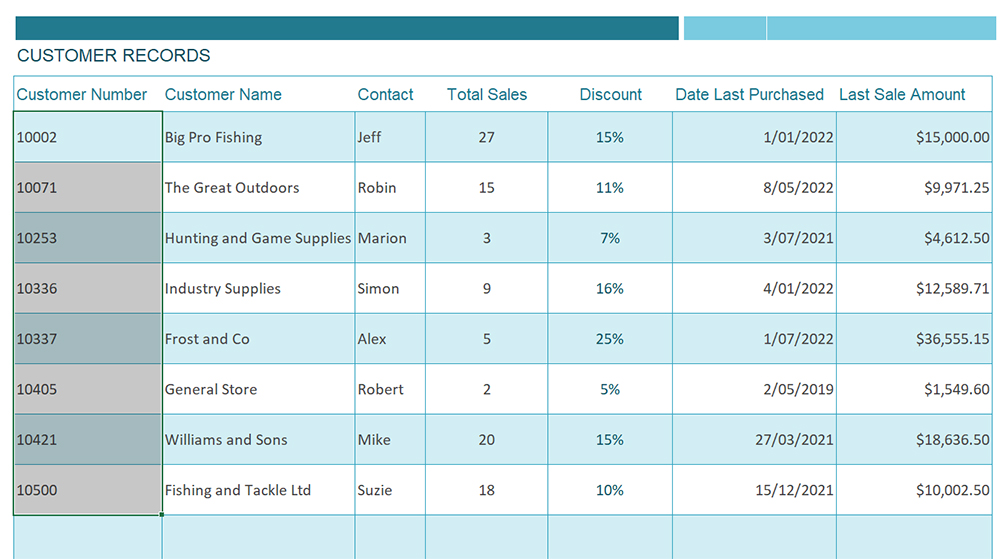
Highlight the cells you want to lock in your Excel spreadsheet
Next, we navigate to the Home tab of the ribbon, click the Format menu to access the dropdown options, and choose Lock Cell:
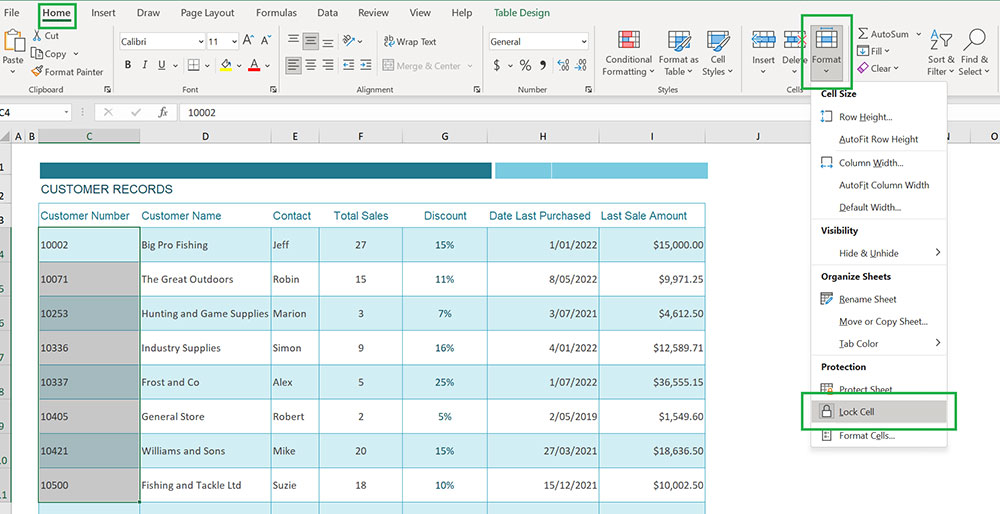
Choose Lock Cell from the Format dropdown menu on the Home tab of the Ribbon
Because we’ve highlighted multiple cells in that column, it will lock all of them simultaneously.
Is there another way to lock cells in Excel?
Yes, there is – instead of using the Ribbon, we can right click on the highlighted cells, and choose Format Cells from the menu.
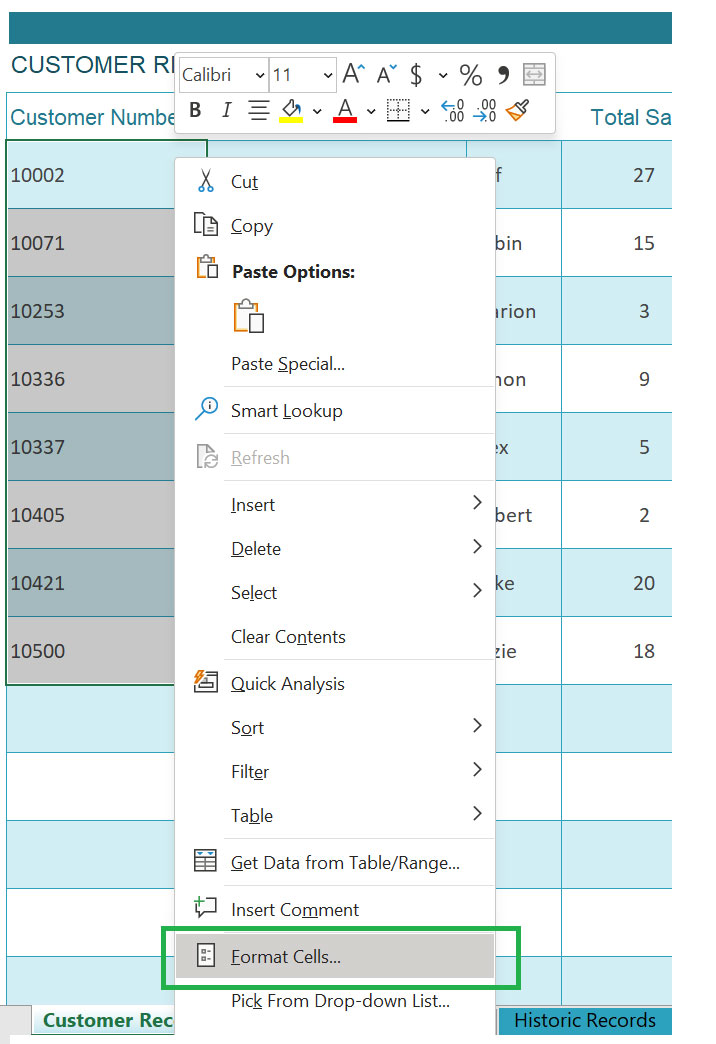
Right click on the highlighted cells, and choose Format Cells
This will open the Format Cells menu. From here, we click the Protection tab, and tick the checkbox next to Locked.
NOTE: To unlock the cells, simply follow the same steps above in reverse.
Why aren’t my cells locked?
There’s one more step to locking the cells – we need to protect the sheet. To do this, click on the Review tab of the Ribbon, and then choose Protect Sheet.
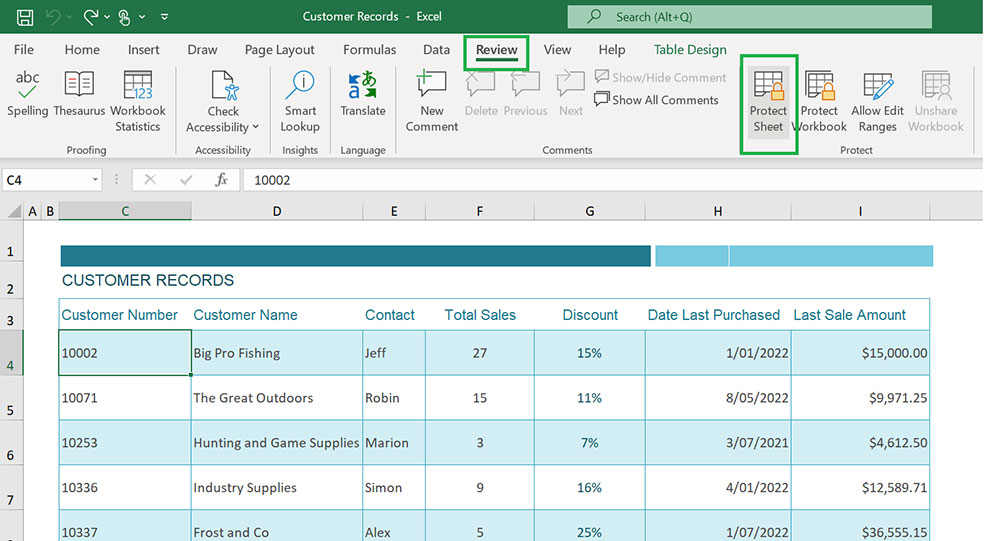
The final step to lock the cells is to protect the sheet under the Review tab of the Ribbon
This will bring up the Protect Sheet menu, where we can choose what editing options that we want users to be able to perform.
One word of caution – don’t forget to make a note of the password you set to unprotect the sheet; there’s no password reset option here!
Interested in computer training?
Microsoft Excel is a powerful spreadsheet tool that’s commonly found in businesses of all shapes and sizes, and chances are that you’ll encounter it often.
Knowing how to lock cells in Excel is just one quick and handy tip that we’ve shared with you today, but here at Computer Cures, our team of experts can provide training and advice not just in Excel but a range of other computer, software and other device related areas.
Need computer and software training?
Make the most of Excel and the Microsoft Office suite with Computer Cures’ friendly and knowledgeable training services. We also provide training in general computer use, mobile devices and basic maintenance, so give us a call on 1300 553 166 or fill out our contact form and we’ll get back to you promptly.


Leave A Comment